
How to Butcher a Chicken

A Farmish Kind of Life is a participant in the Amazon Services LLC Associates Program, an affiliate advertising program designed to provide a means for sites to earn advertising fees by advertising and linking to Amazon.com. You can view our full affiliate disclosure here.
While it was easy for me to write a post on how to butcher a pig and how to separate the many different cuts of pork, I slacked for awhile on writing a post about how to butcher a chicken. A chicken is significantly smaller than a pig and I always worried about getting decent pictures of the process.
Come now, Amy. Get over it. Do your best to show the people how you do the things.
I hope this will be a helpful tutorial of how to butcher a chicken, specifically focusing on what happens after plucking: the evisceration. Evisceration just happens to be my job in the chicken butchering set-up here at Clucky Dickens Farm.

But once I’m into the evisceration, it makes sense that I can’t take the pictures. Right? Right. So many thanks to my youngest son for capturing pictures to help me explain how to butcher a chicken.
How to butcher a chicken: here we go!
The first steps in learning how to butcher a chicken require killing and plucking the bird. You can see more of our set up for that part of the process in Chicken Butchering Set-up: 7 Things You’ll Need, but the actual how-to of those steps will not be included in this post.
Because…evisceration is generally what people need the most help with.
And also because…we forgot to take pictures of those first steps.
This step-by-step starts at the point that we’re ready to remove the chicken’s feet, head, and all the internal “stuff” so your bird can be ready for packaging and put in your freezer.
Are you ready? Because you’re f-i-n-a-l-l-y going to learn how to butcher a chicken!

Wait. First, make sure you’ve got a good processing kit with decent knives. Second, make sure they are sharp. Third, pop over and read my post on 10 Tips for Butchering at Home.
No, really. I’ll wait.
Ready? Ok! Let’s do this!

Keep in mind there are a few different ways to go about eviscerating a bird. I will show you the steps to how we do it here. For instance, we start our process at the chicken’s feet, some folks start with the head. The most important thing is to find a method that works for you.
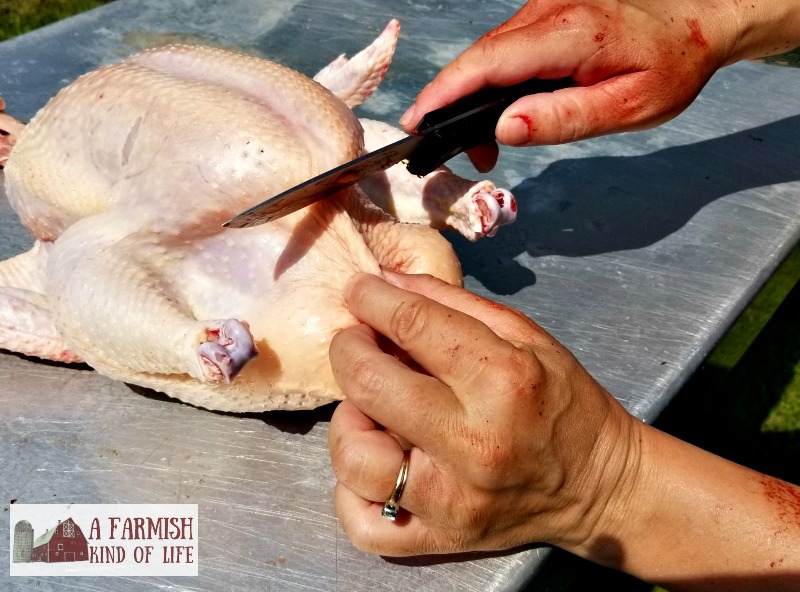
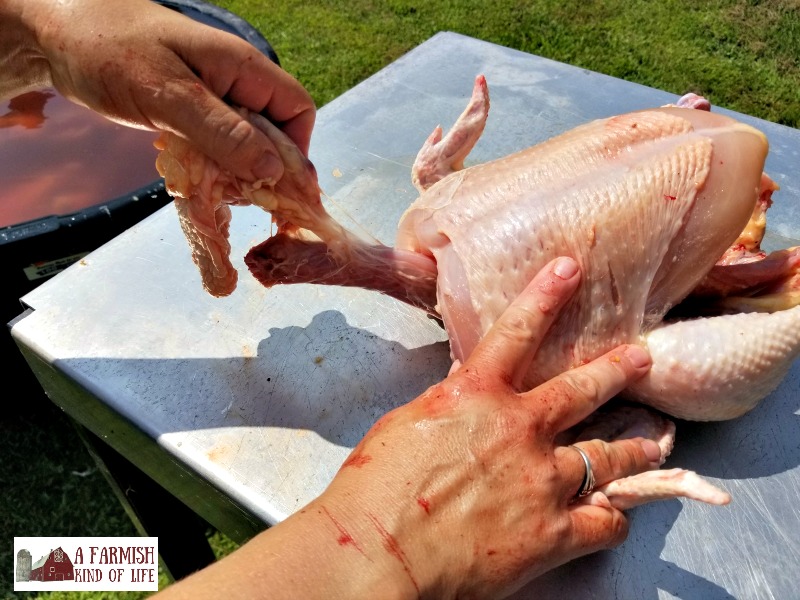
Step One: Remove the feet.
The first thing we do is cut off the feet. With a sharp knife, find the joint above the chicken’s foot and cut through the joint. If you’re having trouble finding it, point and flex the chicken’s foot back and forth and feel for the joint movement. Remove both feet and set aside.

Note: Chicken feet can be used for such things as making a lovely chicken stock. No lie. Elliot Homestead can show you how to use chicken feet. And if chicken stock from feet isn’t your thing, know this: folks have also been known to feed chicken feet to their dogs as treats.
Come ‘ere, Fido…
Step Two: Access the internal cavity of the chicken.
Now that the feet are gone, it’s time get inside the chicken. Don’t freak out—this is going to be way easier than you think. Pinch at the skin as shown below and pull it out a bit while cutting gently towards the rib cage.
Basically you’re cutting in underneath the rib cage to eventually pull out all the internal organs.
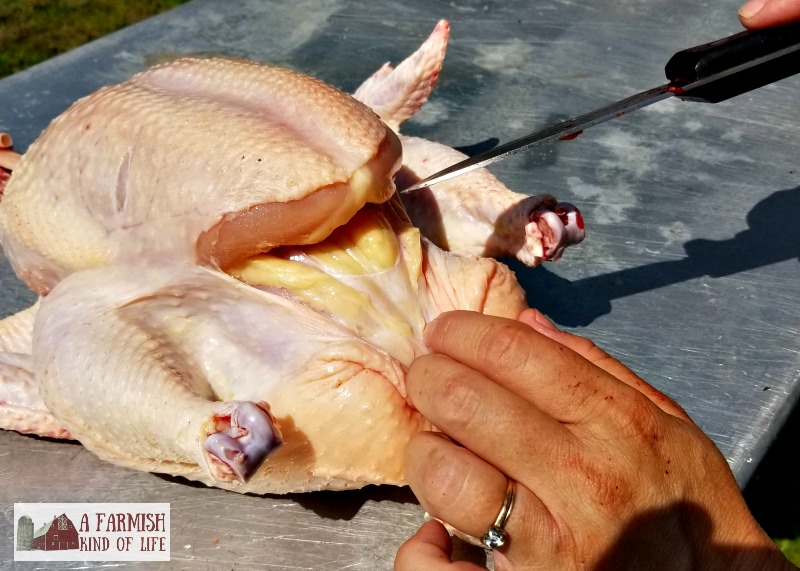
Cut gently, and not too deeply or you risk cutting into various organs. While that isn’t the end of the world, it will make more mess than you probably want to deal with.
When you’ve got one horizontal cut underneath the rib cage, from one leg across to the other, pull the skin out a bit and start to make a vertical cut down towards the tail.

Now, you don’t want to cut to the tail or through the tail because then you’ll end up messing with what’s in the intestines. You want to cut to one side of the tail, as shown below, with the blue line.

Just so we are clear what we are looking at, all the stuff in the red (below)—and stuff further inside the cavity—will be coming out.

Step Three: Remove the innards.
Reach your hand up inside the cavity all the way to the top, grab, and pull. (This is quite possibly why I have always been elected for this job. The smaller your hands are, the easier this part is.)

You have to pull hard, and sometimes it’s tricky because everything is slippery. Keep pulling until the organs (including the intestines) are all out and in a bucket or bag below you. As shown in the picture below, you’ll be left with a big clump of skin (the stuff you had to cut through to originally get into the cavity) and the tail. Go ahead and cut through all of that and remove it.

If you’re unsure of where to cut, you should be able to feel the tailbone near the tail. Cut as close to that as you can.

Now, take a second look inside the cavity of your chicken to see what you’ve missed. The lungs will have to be scraped out—circled in blue below.

Rumor has it that there is a tool called a lung scraper that can help with this, but I’ve always just used my finger tips. Just be careful there are no broken ribs, or you will get poked while trying to scrape the lungs off the ribs.

See the difference on the inside?

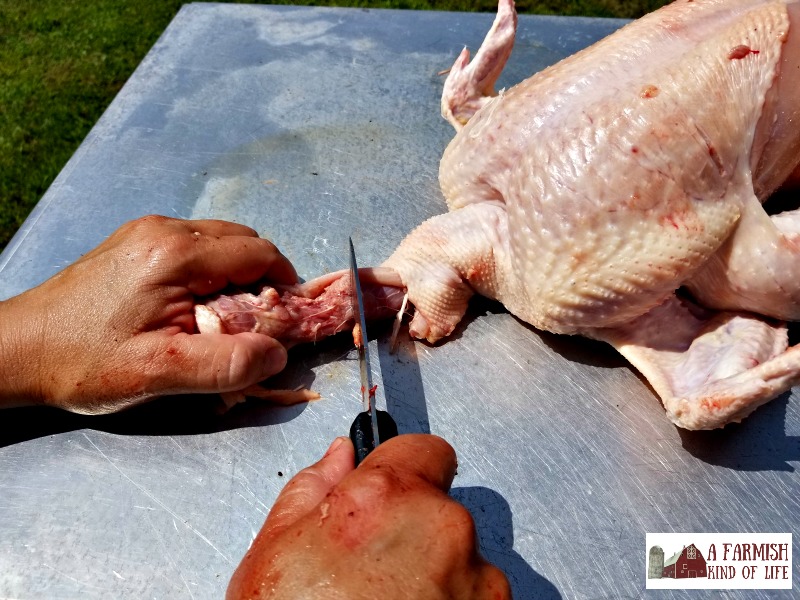
Step Four: Removing the head/neck, and cutting out the crop
Now it’s time to remove the head. Although I demonstrate with a smaller knife here, it’s actually easiest to do this with a cleaver. Set a block of wood under the neck and chop with a sharp cleaver.
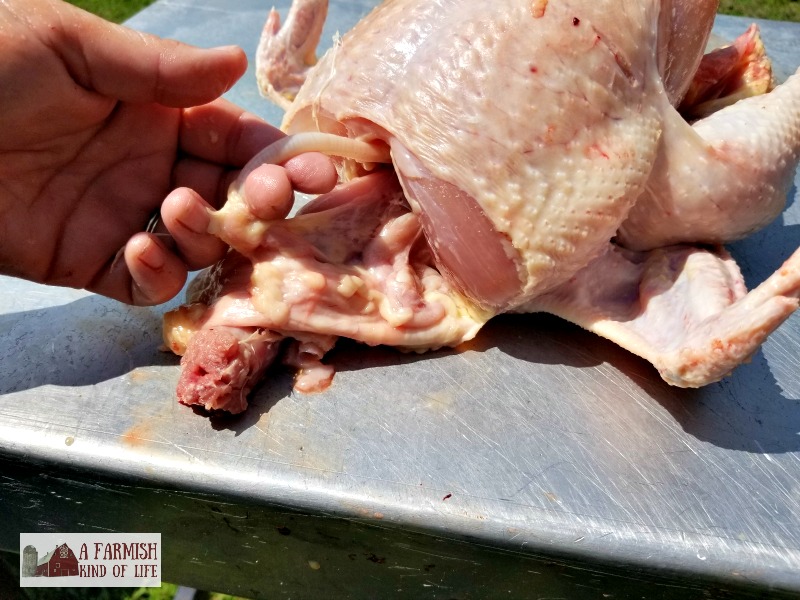
Cut gently at the extra skin at the base of the neck to access the front part of the cavity. Under all this extra skin is where you will find the crop—it sort of looks like a bag or a pocket that fills with whatever the chicken has eaten before it is fully digested.

If you have withheld one meal prior to butchering, the crop should be empty—as shown below. An empty crop makes butchering much easier.

Cut carefully around the crop—did I mention it’s much easier if the crop is empty? Also, if the trachea tube didn’t come out when you were pulling all the innards from the other end, you’ll need to pull it out from the top. This can be tricky. Sometimes you have to ask it very nicely to come out. Sometimes you just have to pull harder.
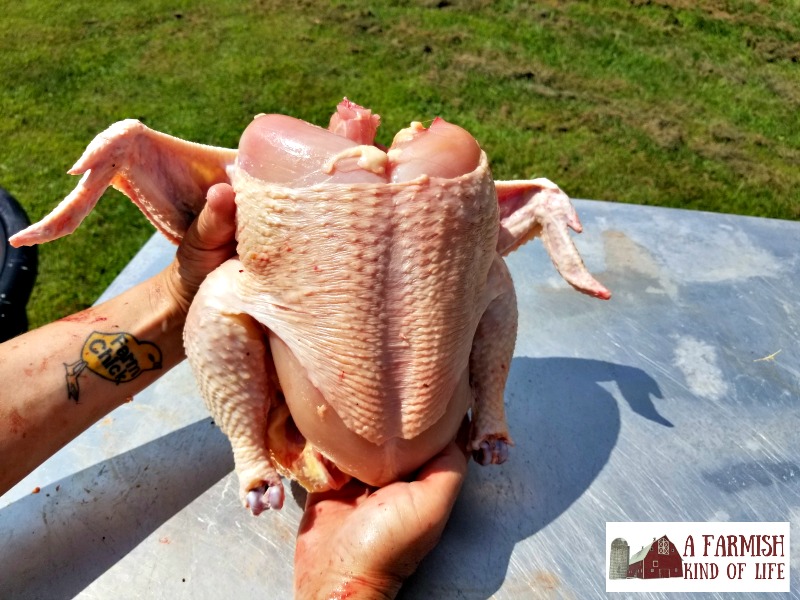
After everything is removed, you’ll be left with a lot of skin that needs to be cut off. My method is to make a slice through everything that’s underneath the neck…

…and then pull everything until it slides off the neck.
We cut the neck off at its base—again, a cleaver works much better than what I happened to have grabbed for this particular bird…

And there you have it! You’ve butchered a chicken!
At this point, we would put the bird in a giant vat of ice water until we get all birds to the point of packaging in poultry shrink bags. Then we bag them, weigh them, label them, and into the freezer they go. The instructions for our full set-up (without showing any birds) is over at Chicken Butchering Setup.
The evisceration part generally takes me less than a minute per bird, but I’ve been butchering chickens for several years. With practice, you will get the hang of it, and then you’ll be able to tell other people how to butcher a chicken!
Do you have any other questions about how to butcher a chicken? Let me know in the comments!

Find More Goodies from A Farmish Kind of Life:
Videos: YouTube, Odysee, TikTok
Social media: Facebook, Instagram, MeWe
Podcast: here on the site or subscribe in your favorite podcast app
Books by me, Amy Dingmann: My books


Thanks for the butchering a chicken info best out there, never have done that and we’re going too soon.
Thanks Again , Deanna
I’m glad you find it helpful! Good luck with your first time processing, and let us know how it goes!
Thanks for this! Going to be butchering a Cockerel tomorrow as well as a duck. This was very helpful.
This is phenomenal! Thank you, thank you! I’m guessing ducks are similar enough that I can use the same steps… thoughts?
Jess
You can, the plucking can be more work but there are tricks to that. To be honest, when we do our ducks, we just breast them out.
How long do you leave the chickens in the ice bath once processes?
An hour or two? The chickens sit in the ice bath until all the chickens are processed, then we move all the chickens in the ice bath to the bagging part of the system. I know many people who say that chickens should rest a long time before being packaged. This isn’t anything we’ve ever done. 🙂
Thanks for the help. I just butchered my free range rooster. Tough to cut through his skin and lots of internal fat. First time butchering a rooster.